Step 1With this DIYs project, the type of turbine connected to the alternator can be change. We propose two different procedures to build a propeller or a turbine.
|
Construction of a wind turbineStep 2Pass on an M3 screw, an M6 nut, an M4 washer, and an M3 nut.
With a pair of pliers and a screwdriver, tighten them all together well. 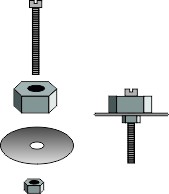
|
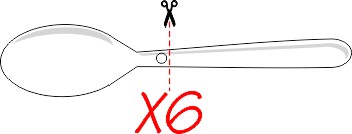
Step 3With a pair of scissors, cut the end of six plastic teaspoons.
 |
With Migros spoons, cut just behind the round mark on the back of the spoon. |
|
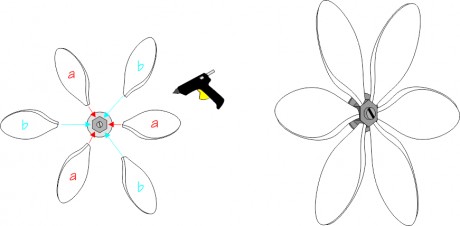
Step 4Using hot glue, glue each spoon on each of the sections of the large M6 nut.
The spoons should be glued in a 'diagonal' position, inclining them all the same way. 
|
Step 5
 |
Firts glue 3 spoons (a) leaving a nut section between each of them. Let them dry, and then glue the 3 remaining spoons (b). |
|
Construction of a water turbineStep 6Pass on an M3 screw, an M3 nut, an M6 nut and an M3 nut.
With a pair of pliers and a screwdriver, tighten them all together well. 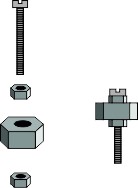
|
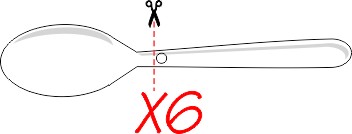
Step 7With a pair of scissors, cut the end of six plastic teaspoons.
 |
With Migros spoons, cut just before the round mark on the back of the spoon. |
|
Step 8Using hot glue, glue each spoon on each of the sections of the large nut M6 making sure to cover them.
 |
Ensure that the cut end of the spoon handle does not overpass the edge of the nut section. |

|
Step 9First fix 3 spoons (a), leaving a nut section between each of them.
Allow to dry and then glue the 3 remaining spoons (b). 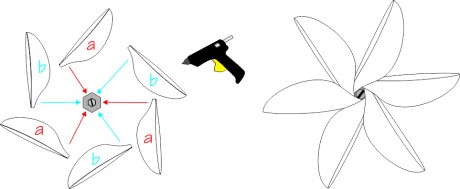
|
Base and connectionsStep 10Using three screws, attach the spring clamp on the top of the short wood slat and two metal brackets to create a steady base. 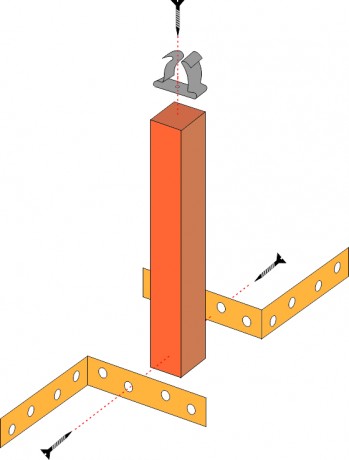
|
Step 11Connect the LED bulb to two electric wires (all ends stripped) using a pair of electric connectors.
Connect the other ends of the wires to two crocodile clips. 
|
Step 12Connect the two crocodile clips to the two contacts located at the rear of the electric motor.
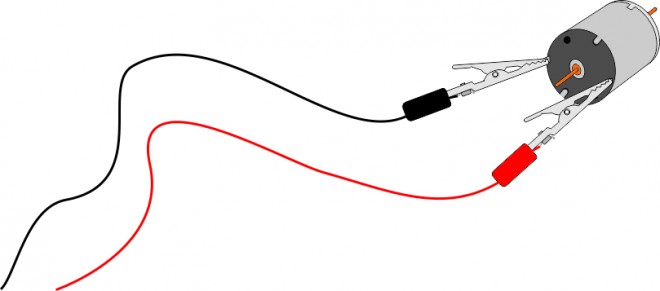
|
Step 13Clip the motor in the spring clamp.
Screw the metal connector on the motor axis.
Draw, colour and cut in a strong cardboard a picture of a device which uses electricity. Make a hole for the LED with an awl.
Unfold the model and pass the LED from the back through the hole. 
|
Step 14Slide a balloon on the end of a plastsic tube to create an 'wind blower tank'.

|


