Step 1
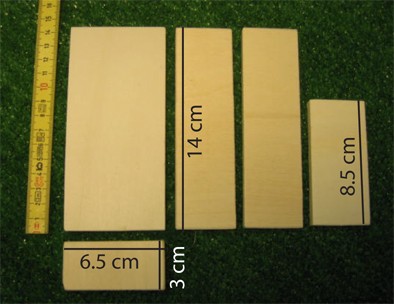
Saw the wood slat to create the following 4 pieces:
Two 14 cm long pieces
One 8.5 cm long piece
One 6.5 cm long and 3dm wide piece
Rub all pieces with sandpaper.
|
Step 2
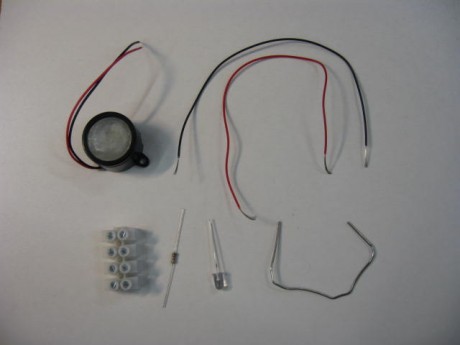
Collect all the elements for the electrical part :
-buzzer
-strip of 4 connectors
-resistance
-LED
-ttwo 20cm long wires
-large paper clip
Strip the end of the wires.
If necessary, strip a bit more the wires connected to the buzzer.
Unfold the large paper clip.
|
Step 3
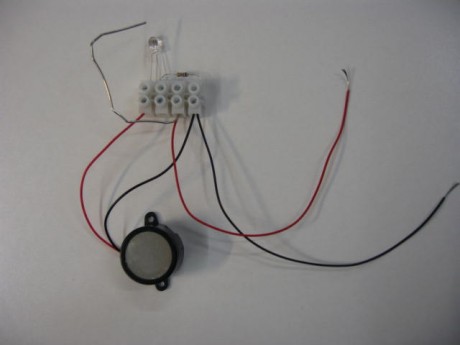
Connect the different components according to the photo and the diagram that you can download in the blueprints/plans section .
 |
LED connection : the longest leg must be fixed in the hole just left of the paper clip switch.
|
|
Step 4A close-up view of the previous step.

|
Step 5
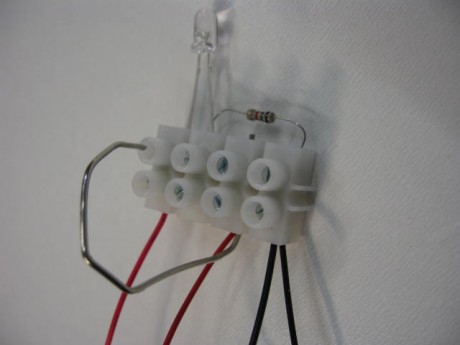
Fold the paper clip and cut part of it to be able to insert it into the hole with the first screw.
I should touch the screw when slightly pressed with the finger but no more when released.
|
Step 6Nail the three pieces of wood to the small board to form a box.

|
Step 7
Using a hot glue gun, fix the buzzer and the strip of connectors.
Twist the ends of the two free wires around brass tacks and pin them on the side so they can touch the contacts of the battery when it will be inserted in the box.
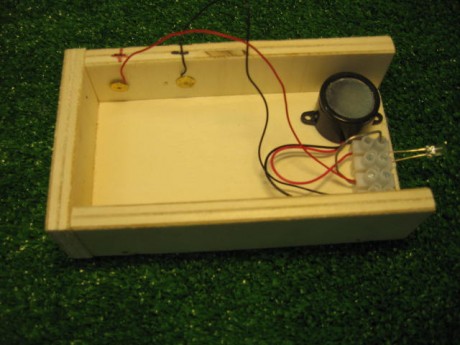
|
Step 8Close-up view to better understand the previous step...
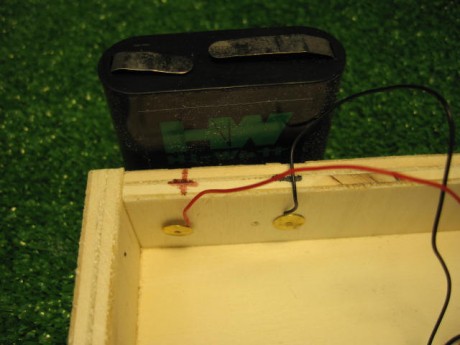
|
Step 9
Slide the battery in place and add a small piece of wood to squeeze the battery in place.
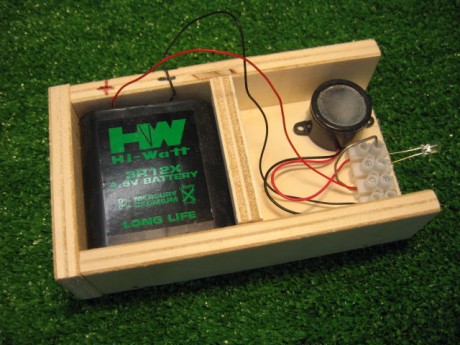
|
Step 10
If you want, you can add a cardboard lid and decorate it as you wish.
Cut an opening so the led and the switch are not hidden.
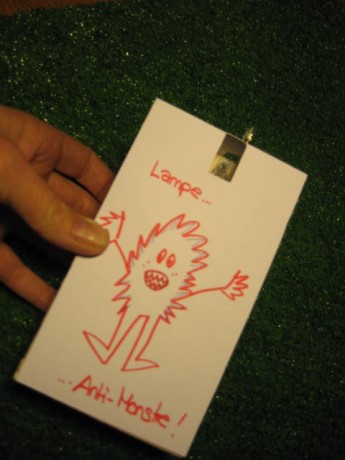
|


