

 Réalisation - Led lamp
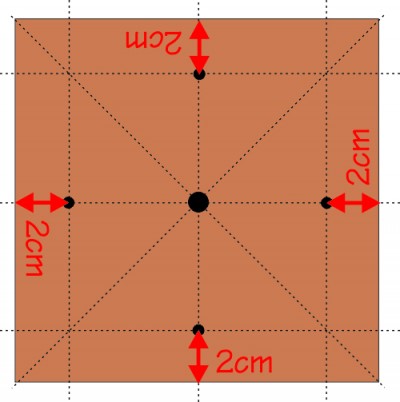
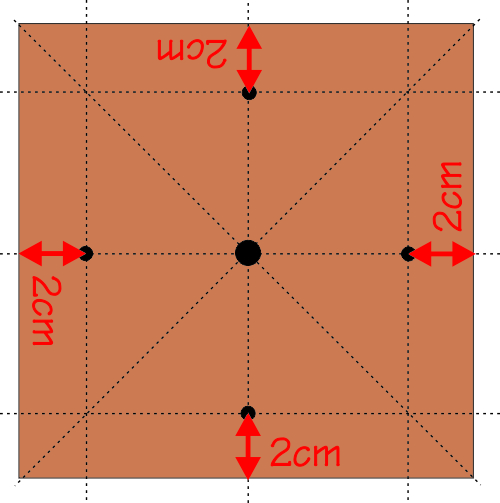
Etape 1
With the drill, drill 5 holes in the place indicated on the drawing. 4 holes with a 6mm bit and a hole in the center with a 10mm bit.
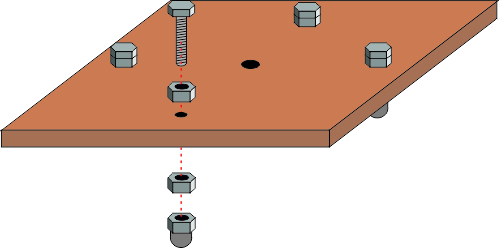
Etape 2
As on the illustration, screw a nut on the 4 screws. Pass the screws through the 4 side holes and screw/tighten on the other side with a nut followed by a an acorn nut.

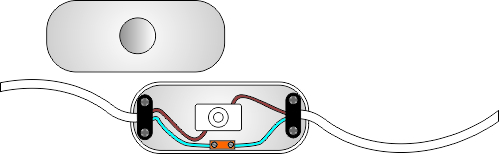
Etape 3
Cut the electrical cable at 45cm from the bare end and reconnect both parts using a switch (follow the diagram).

Do not forget to strip the electrical cables before connecting them. 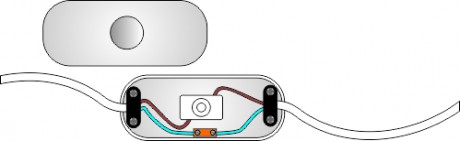
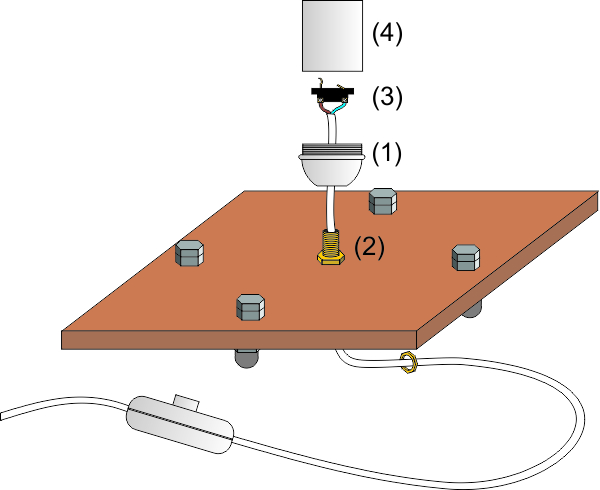
Etape 4
Pass the threaded fitting through the center hole of the board and secure it with two tight nuts on either side of the board.
Unscrew the base of the socket(1) and screw it onto the threaded fitting(2).
Pass the electrical cable through the central hole and connect it to the electrical connector (3).
Assemble the two parts of the socket by screwing the top par (4).

Etape 5
Cut off a 1.4cm strip from the A3 tracing paper to shorten it in length.
- Fold a 1cm flap then the rest of the sheet in four equal parts.
- Fold in three lengthwise.
- Fold the diagonals according to the diagram below.
Glue the flap to the other end of the paper to form a 'chimney'. Then, gently, fold/push the different elements to give the lampshade its shape.


 |  |  |  |  |