

 Réalisation - Solar electricity storage
Etape 1
Drill the board at the 6 locations indicated on the model (pdf file under Blueprints&plans)


Etape 2
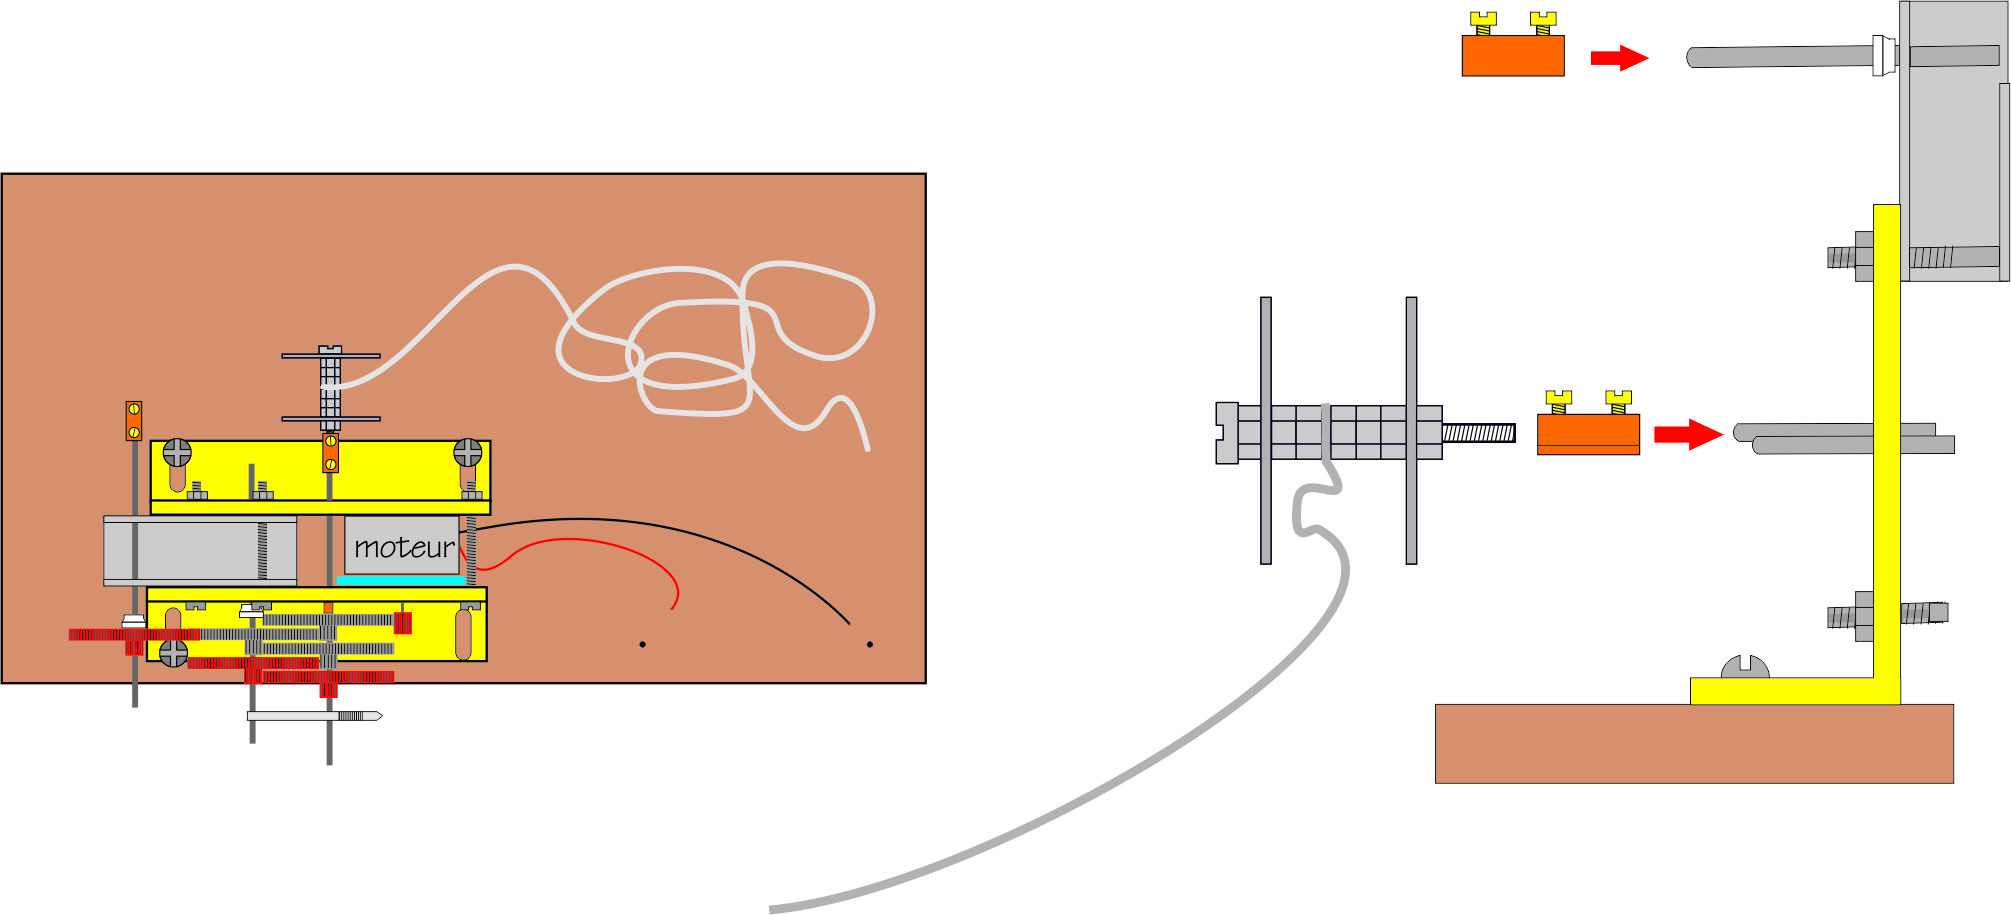
Make a large hole in the center of the foam square. Insert the motor and the foam square between the two brackets according to the diagram. Tighten with two screws and nuts passed through the holes indicated on the diagram. Place the toothed gear on the motor shaft.


Etape 3
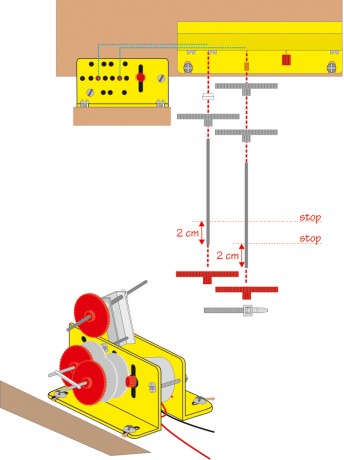
About 5mm from both ends of the aluminum profile, drill holes with a 3mm metal bit.


Etape 4
According to the diagram, fix the aluminium profile between the two brackets with a screw and a nut.
In the other hole, put 1 axle with a spacer and a fixed gear on one side and another spacer on the other.
The axle must exceed the gear wheel by 2cm


Etape 5
Fix the construction on the board with 4 wood screws.


Etape 6
Slip the fixed gears onto the axles, leaving 2cm of the axle protruding.
From the other ends, slide the free wheels, the spacer and the brass tube.
Overlap the gears and pass the axles through two holes in the brackets.
Hold the two axles together with a small plastic cable tie without forcing.

Etape 7
Cut two 3cm diameter discs from cardboard or thin plastic and punch the center with an awl.
Create a coil with the disks, 1 screw and 7 nuts according to the diagram.
Attach the end of a thin cord (string) of about 3 meters to the center of the coil.


Etape 8
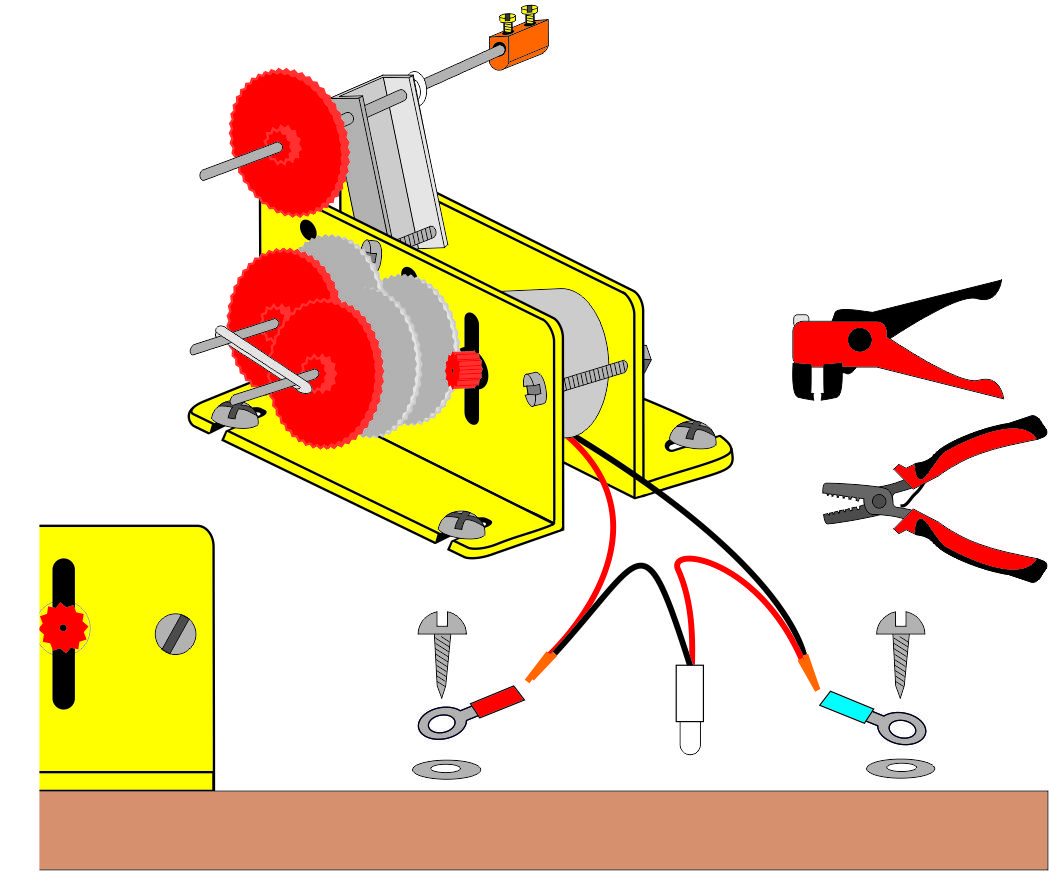
Attach two connectors to the two rear axles as shown.
Attach the coil to the connector on the axle closest to the motor.

Etape 9
Strip and twist the motor and diode wires together to create red+black pairs.
Fix a crimp on each pair with a crimping tool (/!\ respect the colors of the diagram).
In the two remaining holes on the board, fix two washers and the crimp connecters with two wood screws.

Etape 10
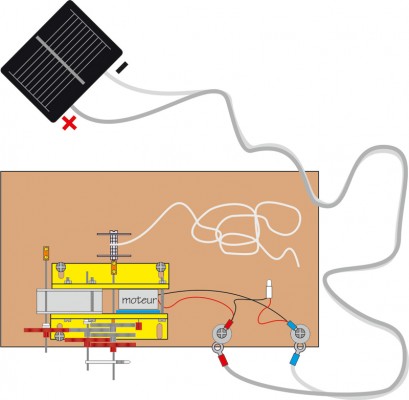
Attach two other crimps to one end of the electrical cable and slide them under the washers on the board.
At the other end, connect the photovoltaic solar collector.
Make sure to respect the polarities!

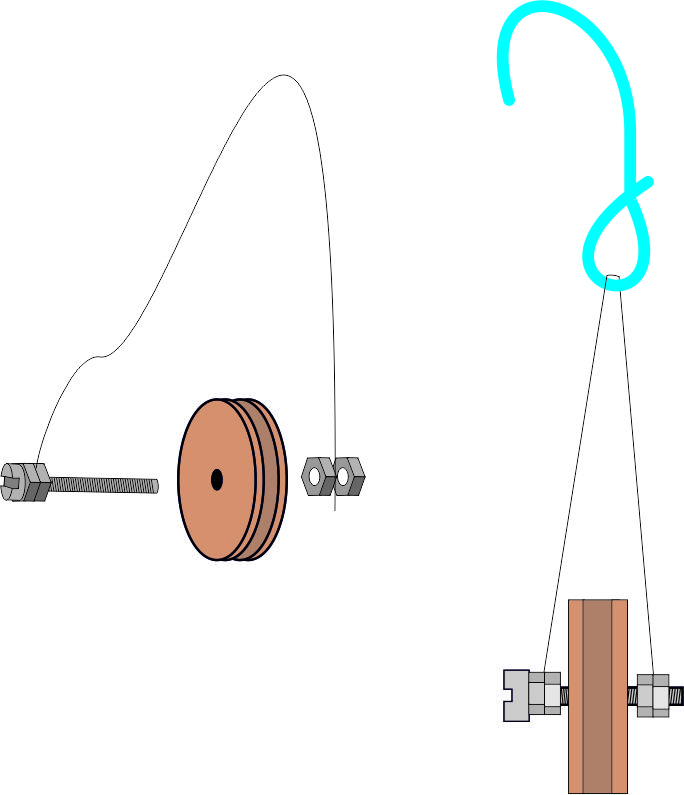
Etape 11
Build a hook with the large electrical wire.
Put two nuts on a screw and pass it through the wooden pulley.
Secure with two nuts on the other side while leaving the pulley free to turn. On both sides hang a small wire and fix it to the hook.
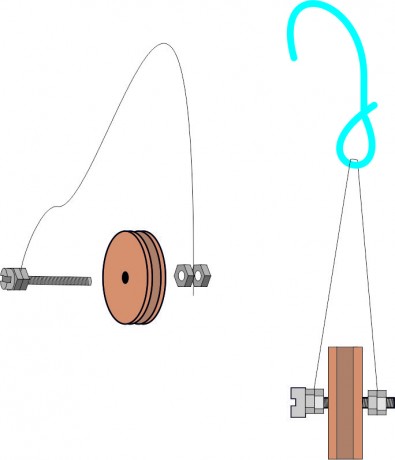
Etape 12
Attach the pulley about 1-2 meters from the ground.
Place the base of the model on the ground and pass the small rope through the pulley and back.
Attach to the end of the rope a bottle on half filled with water et put it next to the model.


 |  |  |  |  |  |  |