

 Réalisation - Solar chimney
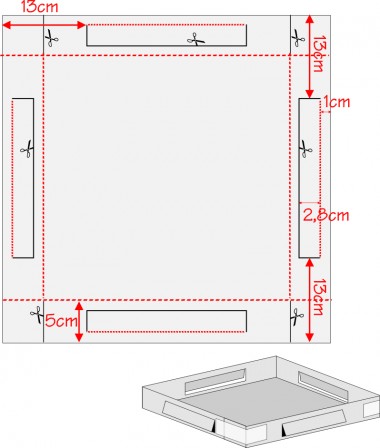
Etape 1
Report the lines on the 40 x 40 cm cardboard piece as shown.
Lightly mark the dotted lines with a cutter and cut along the solid lines.
Fold the edges to form a box and fasten them using a strong adhesive tape.

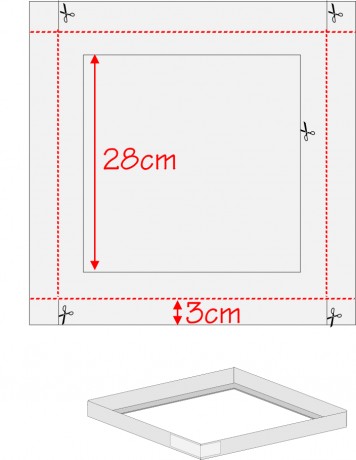
Etape 2
Proceed similarly with a 37 x 37 cm cardboard.
Follow the indications and cut out a 28 x 28 square window in the middle.
This will be the "lid".
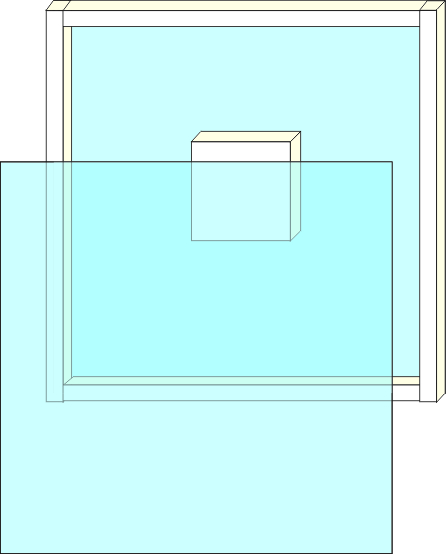
Etape 3
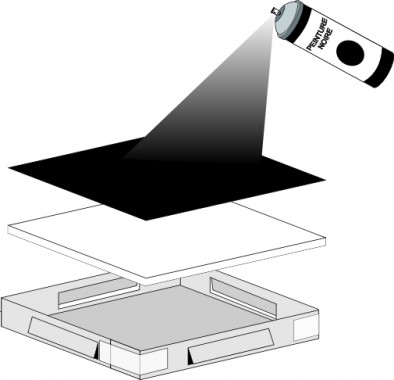
Place a square of expanded polystyrene on the bottom of the box and add on top a 30x30 cardboard.
Paint the inside of the cardboard box black (including the edges).

Etape 4
Using double-sided adhesive tape glue the long pieces of rigid panel along the edges of the transparent acetate. Glue the same way the small square in the middle.
Still using double-sided adhesive glue the second square acetate on top.

Glue the central square particularly well with plenty of double-sided sticky tape. 
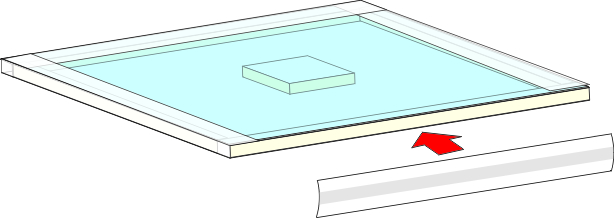
Etape 5
Seal around the edges with large transparent adhesive tape .
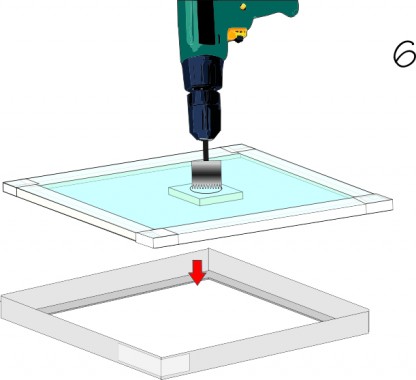
Etape 6
Drill a 4cm circle in the middle of the "glass".
Glue the "double glazed Window" in the lid with double-sided adhesive tape.

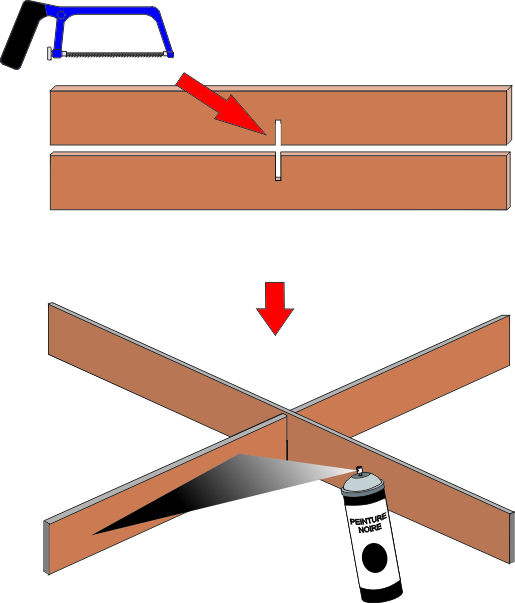
Etape 7
Cut two cuts in the center of the 2 plywood slats.
Form a cross and paint it in black.

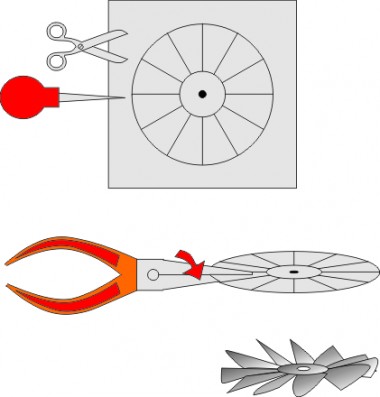
Etape 8
Report the diagram of the turbine on the thin aluminium plate (model downloadable from the blueprints/plans section)
Make a hole of approx. 2 mm in diameter in the middle of the circle with an awl.
Cut out the circle with a pair of scissors as well as its segments.
Using pliers, bend slightly each blade to form the turbine.

Etape 9
Cut out a "window" in the tube using a saw and a cutter (see illustration)
With the help of a cutter, cut 4 vertical cuts at the base of the tube in order to insert it on the wooden cross.
Pass the tube through the glazed lid and fix it on the wooden cross in the base.
Push the lid on the base box.


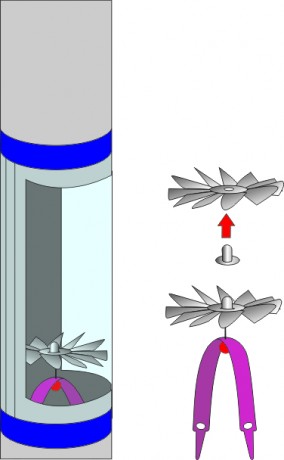
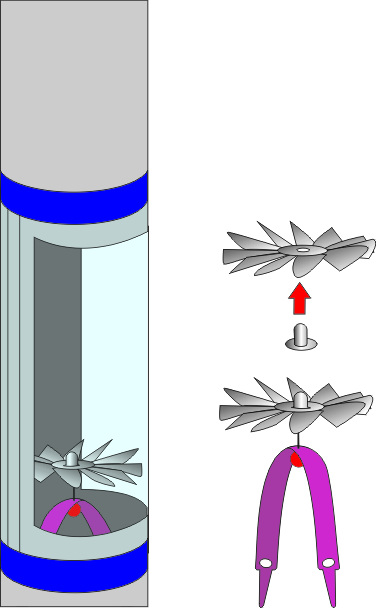
Etape 10
Push the rivet through the hole of the turbine. If it is too losse, push back a little bit the edges of the hole so that the rivet is squeezed in place.
Pierce the centre of the plastic binder with a pin. Hold the two ends of the plastic binder and bend them. Put the turbine on the pin and introduce it through the chimney's opening.
Release the binder which should now hold on the edges like a spring. The turbine should be gently kept in place.
Adjust the setting of the turbine so that it can turn freely.Cover the tube opening with a piece of transparent acetate and fix it with tape. No air should leak through this 'window'.
 |  |  |  |  |  |  |  |