

 Réalisation - Solar flashlight
Etape 1
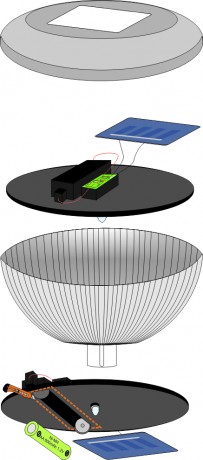
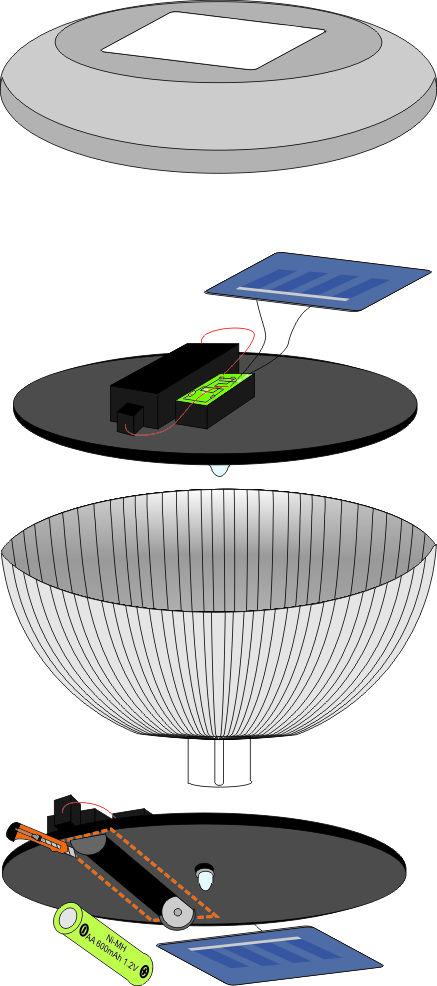
Disassemble the garden lamp in order to extract the elements needed (photovoltaic cell, electronics, LED and battery).

It is important to keep the wire connected. Extract the battery slot by cutting the plastic around it with a box cutter.
Etape 2
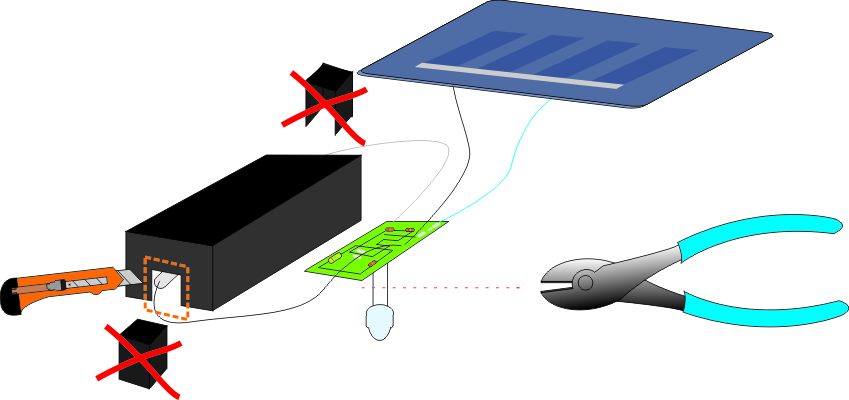
Cut the "legs" of the LED attached to the electronic circuit halfway with cutting pliers.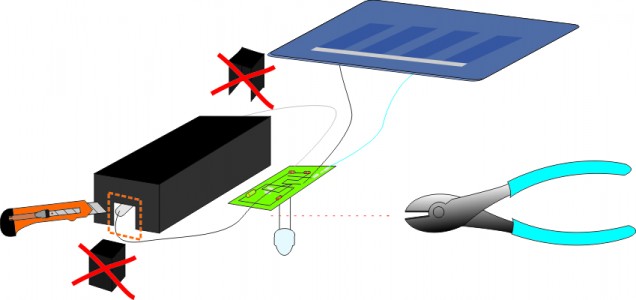
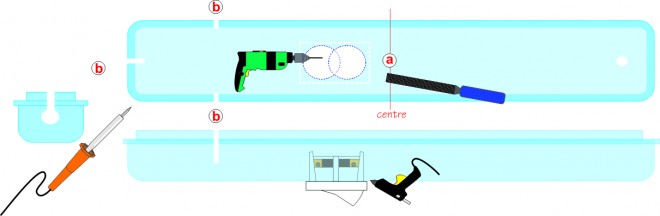
Etape 3
At the bottom of the toothbrushbox, drill 2 holes (a) overlapping a bit with a drill and a 13 mm bit.
Enlarge the hole with a file, push the switch through it.
With the soldering iron, melt the plastic at 3 points (b) to create openings in order to pass the cables and the LED "legs" when the cover will be closed.

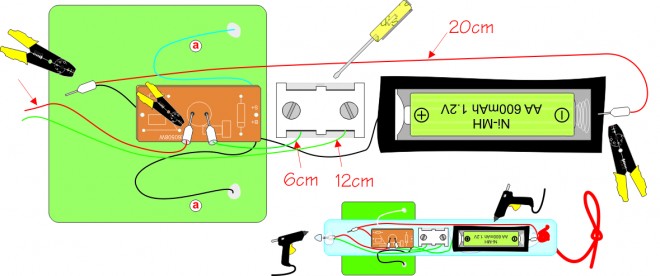
Etape 4
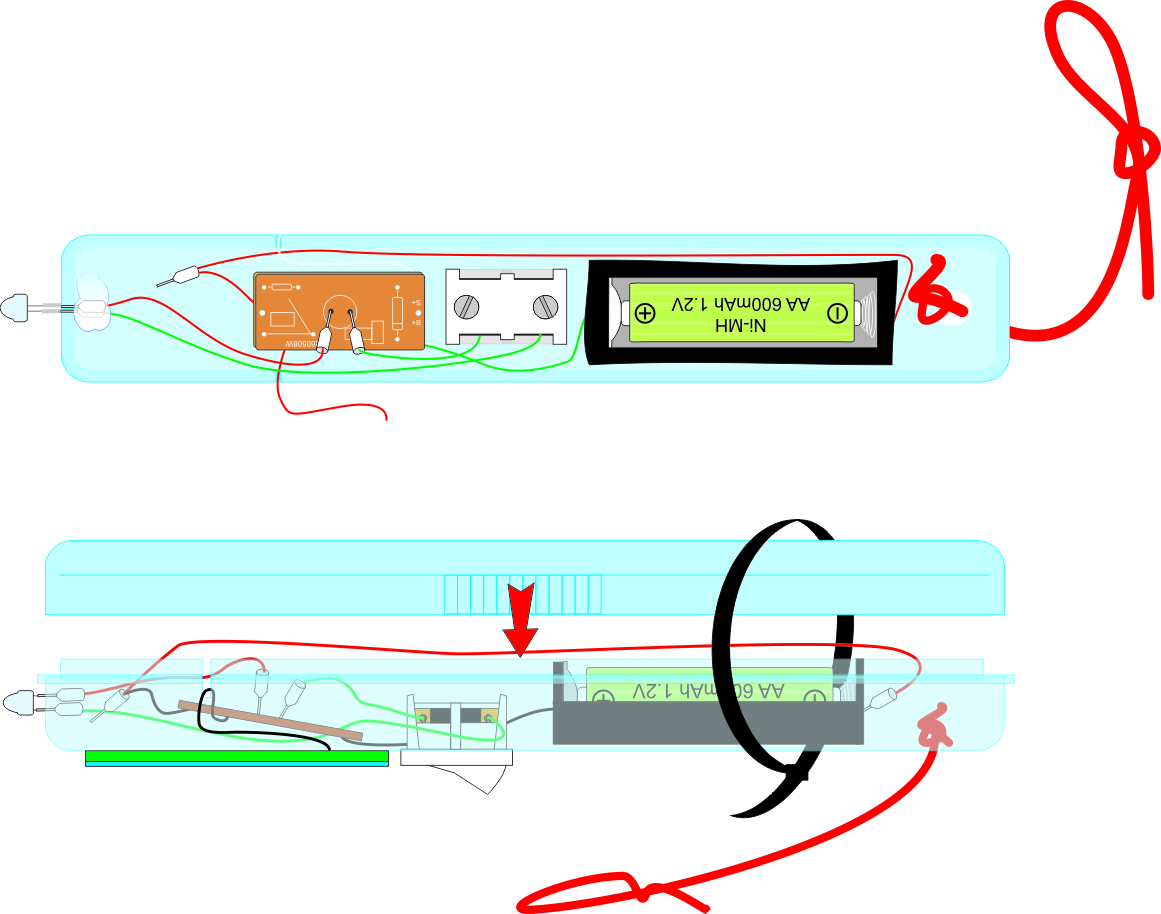
Following the diagram :
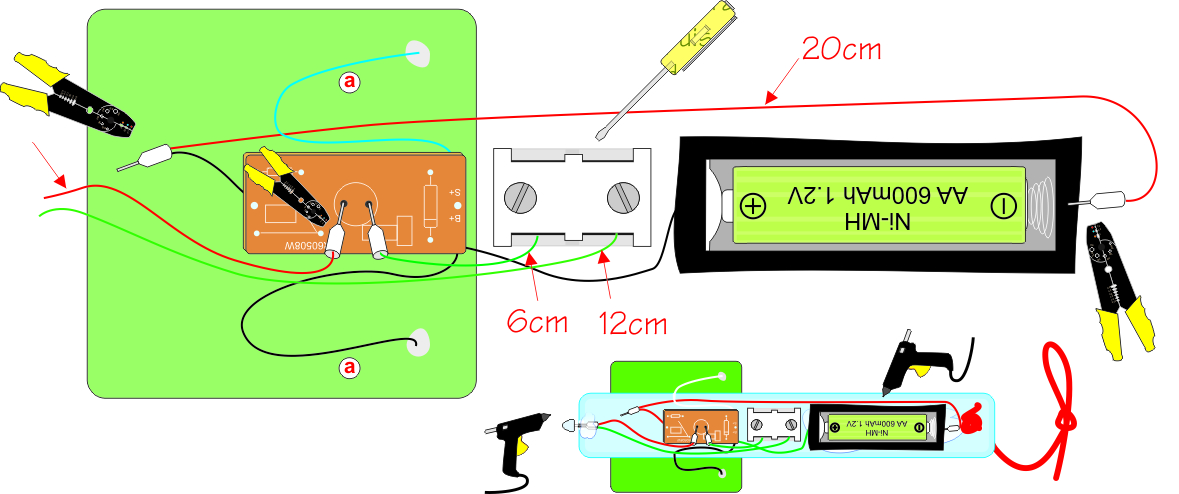
Strip and then connect the wires according to the diagram using small electrical connectors and crimping tool. Don't do it yet for the led legs.
Lengthen the cable leaving from the negative battery terminal with 20 cm wire to be able to distribute all elements along the box.
Glue the battery housing inside using thermal glue. Pass the wires (a) into the lateral openings and bring the photovoltaic cell on top of the box.
Paste the cell on the bottom of the box next to the switch.
Before crimping the LED "legs" with two small electrical connectors, check that it lights up when the switch is on (if it doesn't reverse polarities).
Tie a knot in the string and pass it through the back hole to form a wrist strap.
Etape 5
Close the cover and tighten it with a plastic cable tie.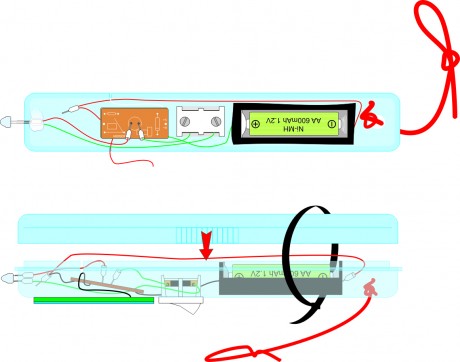
 |  |  |  |  |