

 Réalisation - Electro-solar garage
Etape 1
With a cutter, cut a shape according to the model in the plastic board (forex).
Mark the 5 points to be drilled according to the pattern.
Etape 2
Drill the hole (A) with a 10mm bit.
With a punch make the other 4 holes ensuring that the hole (B) is slightly larger so to pass a brad pin.


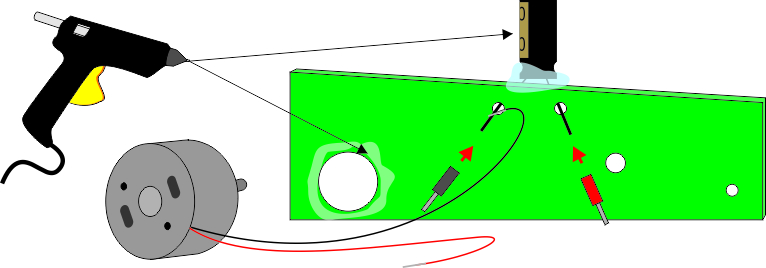
Etape 3
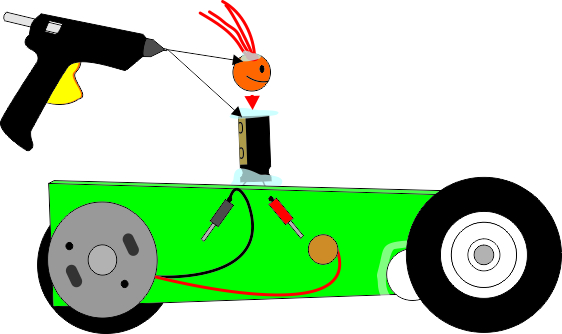
Surround the larger hole with hot glue and fit in the electric motor.
Insert the two 'feet' of the capacitor into the top holes from the back of the board, ensuring that the '-' side is facing the motor.
Connect this 'foot' - with the black wire from the motor (the end of which will have been stripped) to a cable tip and fix them with a crimping tool.
Attach the other foot with a cable tip to hold the capacitor in place. Add a little more hot glue to keep the capacitor vertical.

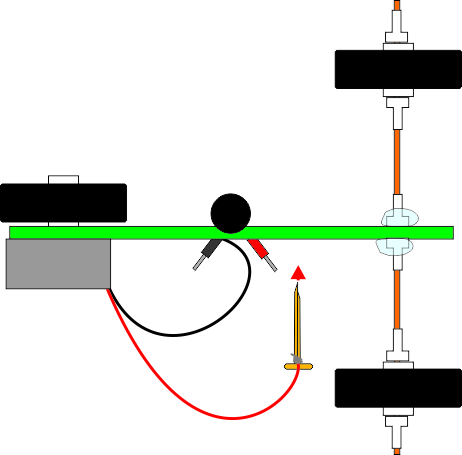
Etape 4
Hot glue a plastic fitting to the centre of a wheel and slide it on the motor shaft.
Pass the metal rod through the front hole of the plastic board.
Fix it in the centre by passing 2 plastic connectors on either side.
Hold in place with hot glue.
Attach two wheels to the ends between the two fittings. Leave enough space for them to turn freely.


Etape 5
Strip the end of the red wire that is still free from the motor and connect it to a brad pin by wrapping it around.
Then pass the brad pin through the hole (B) and unfold the two 'legs' on the other side.

Etape 6
Using the glue gun, attach strands of wool to the hole in the bead and glue it to the capacitor.
With a marker, draw the eyes and mouth of the 'pilot'.

Etape 7
Shorten a pin with a pair of wire cutters, leaving about 2mm.
Stick it in the bottom of the frame.


Etape 8
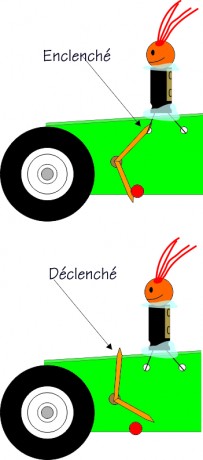
Twist the two 'legs' of the brad pin so that one of them touches the capacitor 'leg' and the other is wedged in place behind the pinhead.
By releasing the 'leg' held by the pinhead, the other 'leg' should disconnect from the capacitor.
It takes quite a bit of 'fiddling' with the 'legs' of the brad pin to find the right setting where the contact is pushed firmly against the capacitor.

Etape 9
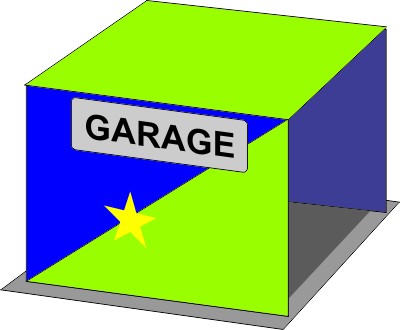
Create a garage for the car using pieces of cardboard, glue, stickers, markers, staples, etc.

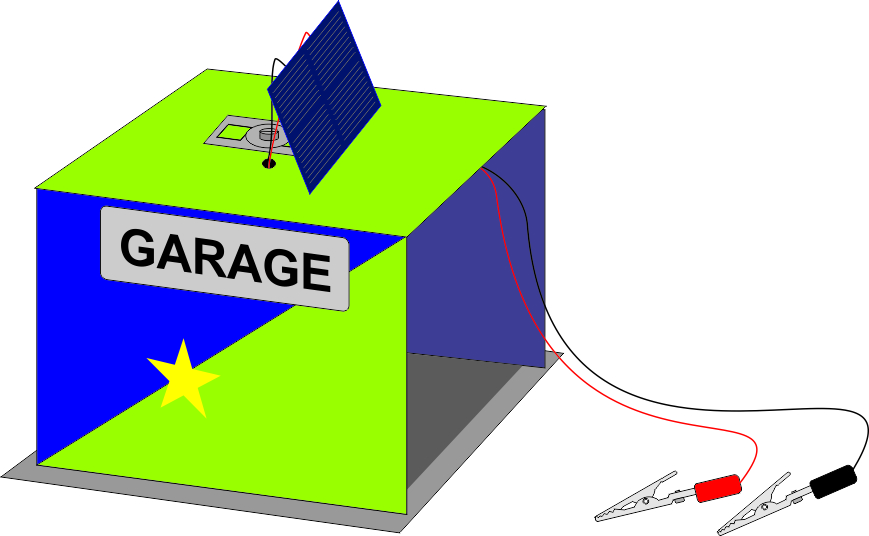
Etape 10
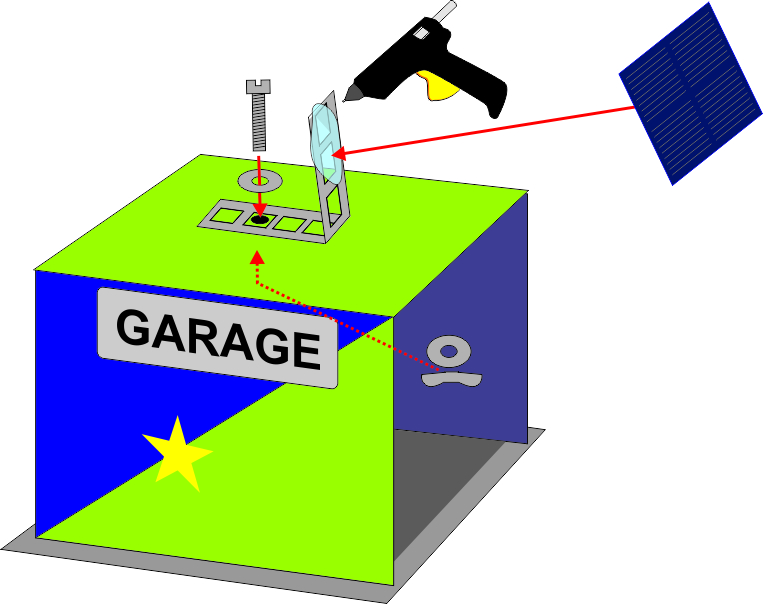
Bend the fixing cable to form an angled support.
Fix the photovoltaic cell on it with hot glue.
Drill a hole in the roof of the garage and fix the support with a screw and washer on one side and a washer and thumb screw on the other.

Etape 11
Strip the ends of the two wires, one red and one black.
Connect them to the contacts of the cell, the red wire to the + and the black wire to the -.
Drill a small hole in the roof of the garage and pass the two wires through it.
Connect two alligator clips to the ends of the two wires.

 |  |  |  |  |  |  |  |