

 How to use ? - Amazon rainforest in a bottle
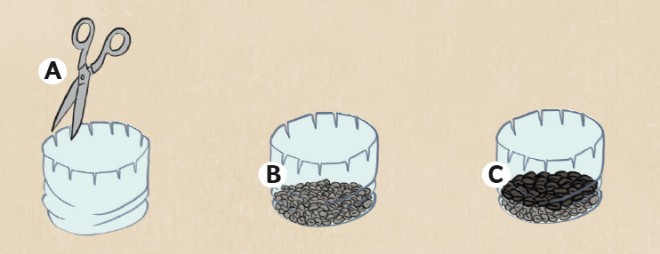
Step 1
Cut the pet bottle 10 cm from its bottom and make small notches on the rim.
Add a layer of gravel (2 cm).
Add a layer of charcoal (1 cm).

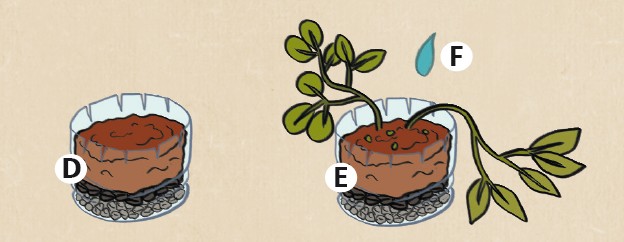
Step 2
Add potting soil almost to the top.
Prick the plants and plant three bean seeds and sprinkle with watercress seeds.
Add 1 teaspoon of water

Do not add too much water to prevent it from rotting. If the earth is already wet do not add anything. It is always possible to add some water later through the top of the bottle. .

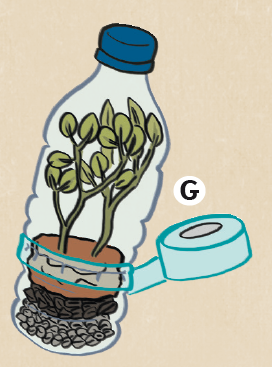
Step 3
Slide the top of the bottle onto the base and tape them together to seal.

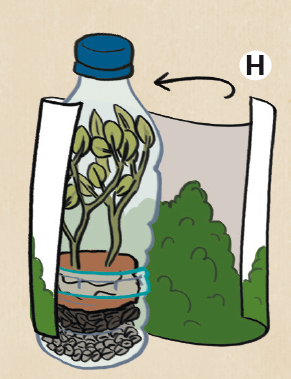
Step 4
Download the forest model in the Blueprints/Plans section and print it on an A4 sheet.
Wrap the PET bottle with the sheet as shown on the drawing and fix it with the tape.
Leave a space to watch the plants grow.
Before closing the bottle, you can add small plastic figurines (e.g. dynosaur, animal, etc.)
The paper limits the amount of light that arrives on the plant (as in a rainforest). The light coming mostly from the top, the plants will tend to grow upwards. 
 |  |  |  |
0 Comment(s) | Add