

 Réalisation - Wave power station
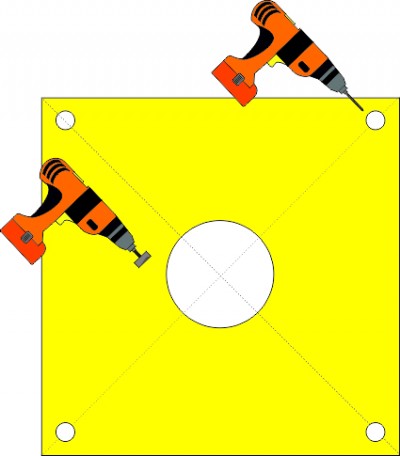
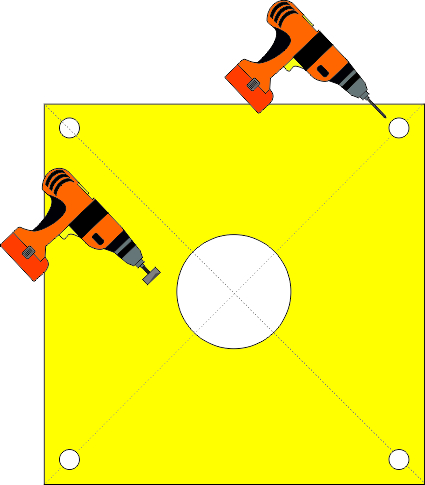
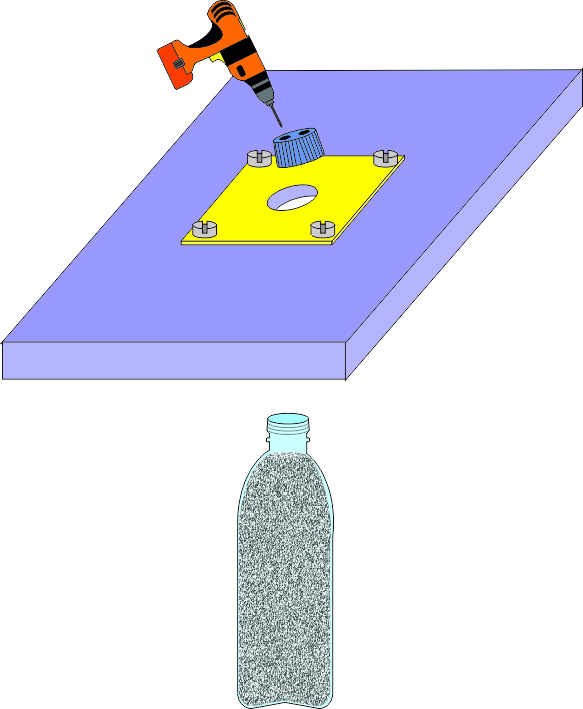
Etape 1
Mark the centre of the plastic (forex) square and cut 3cm circle with the drill and piece cutter.
At 1cm of all corners drill a hole with a 6mm bit.
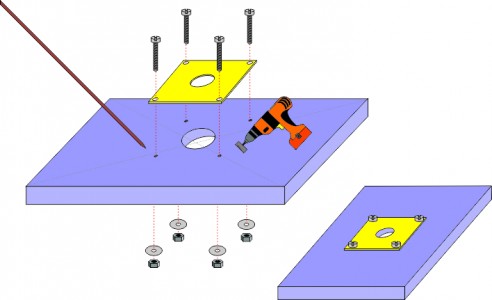
Etape 2
Drill a 4.5cm diameter hole in the centre of the XPS board. Place the forex square in the centre of the board and mark the locations of the 4 holes. Drill these holes using the bamboo stake as a punch.Pass the screws through the forex square and then through the XPS board. On the other side, put washers on the screws and tighten them with nuts.

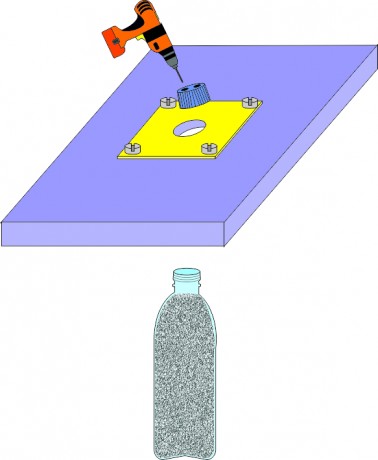
Etape 3
Drill two 6mm holes in the cap of the PET bottle.
Fill the bottle with sand.
Pass the PET bottle from under the XPS plate and tighten on the other side with the cap.
If it doesn't hold very well, you can add some elastic or string on the neck of the bottle to create a joint.
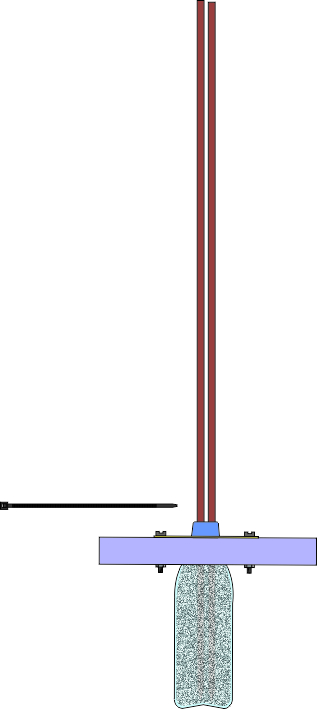
Etape 4
Push the two bamboo stakes through the holes in the board and into the sand.
Tighten the base of the stakes with a colson clamp.

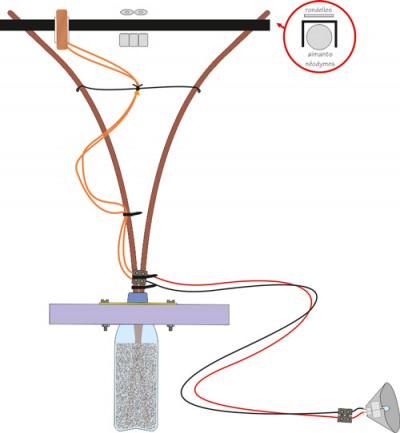
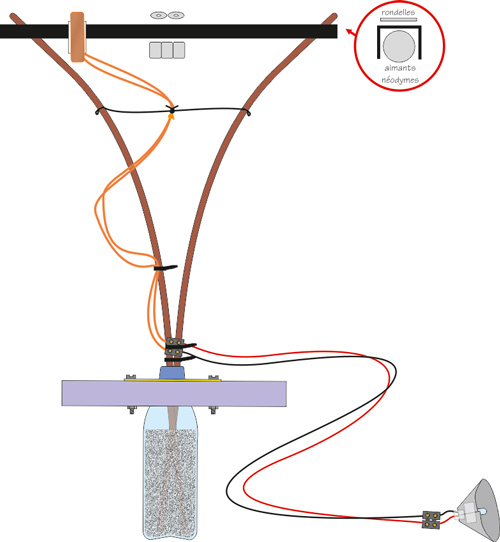
Etape 5
Set aside about 30 cm of copper wire before winding the rest of the wire onto a round support that is slightly wider than the plastic ring.
Also leave about 30cm of unwound wire at the end.
Attach the coil with 4 small pieces of copper wire.
Pass the plastic ring through the centre of the coil and glue it in place with a few dots of hot glue.With a candle, burn the ends of the two copper wires. Scrape off the soot and remaining varnish with sandpaper.
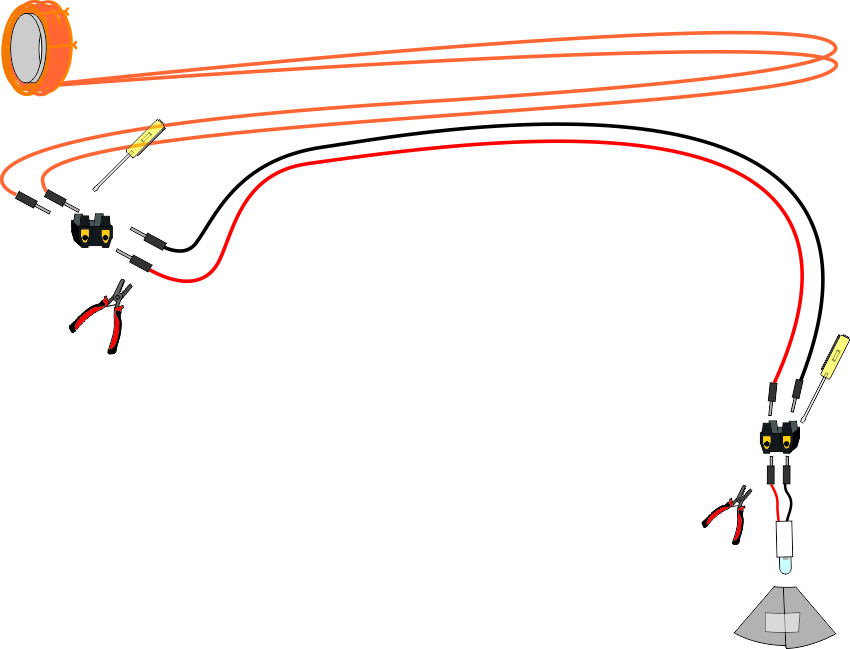
Add two small cable tips and tighten them with a crimping tool.


Etape 6
Strip the ends of the two wires and attach cable tips.
Connect the two copper wires to the two electrical wires using an electrical connector.
At the other end of the wires, connect the LED with the two cable tips.
Create a reflector for the LED using thick aluminium foil and fix it with adhesive tape.

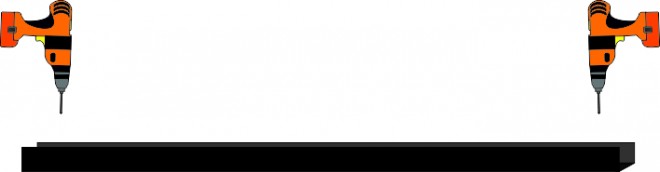
Etape 7
Drill two 6mm holes at 1cm from the ends of the plastic U-profile.
Etape 8
Pass the U-shaped profile through the coil.
Spread the stakes on both sides and pass them through the holes in the profile.
Place 2 small washers on top of the center of the profile and introduce into the profile the 3 magnets stuck to each other. They will be attracted by the metal of the washers.

Handle neodymium magnets carefully as they are very strong and can pinch or cut after breaking against each other. Tie a sewing rubber band to the copper wires about 10cm from the coil. Twist the copper wires under the knot to prevent them from slipping through the knot.
Attach the elastic to both stakes and adjust the tension so that the coil is held just before touching the stakes.
 |  |  |  |  |  |  |  |