

 How to use ? - Solar model
Step 1
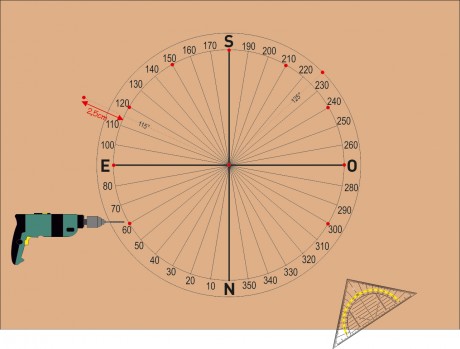
In the center of the wooden A4 board, draw a circle of 7cm radius with a compass. Draw the two perpendicular axes of the wind rose darker. Using the protractor, draw 36 angles of 10° and mark them as in the picture below (N = 0°, E = 90°, S = 180°, O = 270°). Draw from the same point, a circle of 8.3 cm radius.
Mark the 12 points indicated in red. Two dots are slightly outside. The first is on the line of the angle 115° to 2.5 cm of the central circle (location of the tree). The second is on the intersection of the 125° angle and the outer circle. With a drill equipped with a 2mm bit drill these 12 points.

Step 2
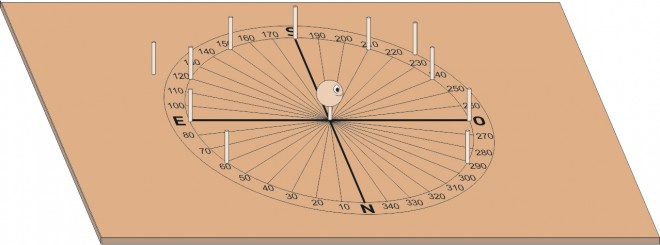
In each hole, put a tip of glue and push throug a piece of toothpick of about 1cm (keep them perfectyl vertical).
Wait until the toothpicks are well glued, then draw a face on the small wooden pearl and glue it and push on the center toothpick.

Step 3
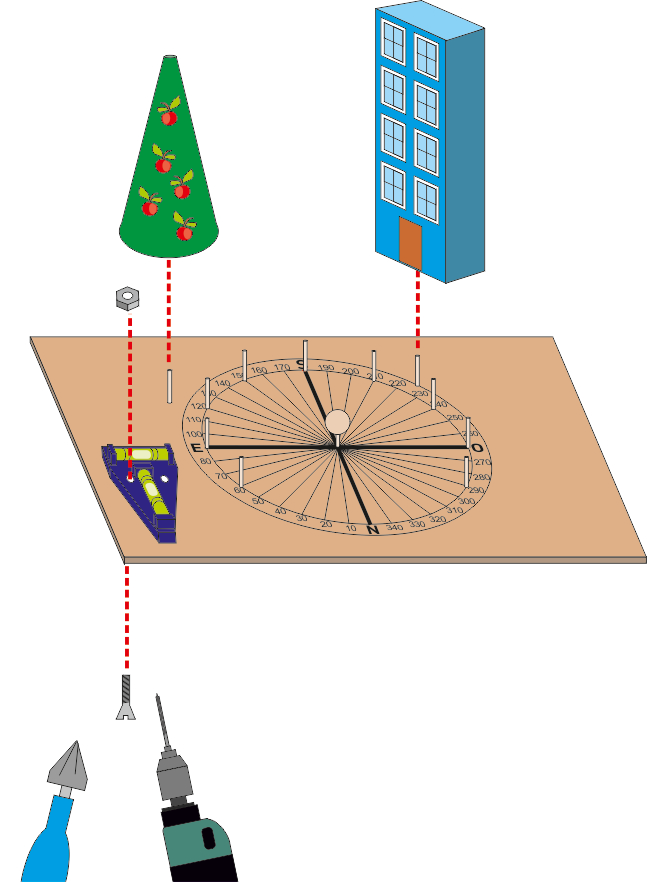
Paint and decorate the building (wooden bar) and the tree (cone). Exactly in the center of their base, drill a hole with a 2mm bit. Enlarge the hole with an awl so that these two objects can easily be slipped on their toothpick and be held in place.
Drill the board with a 4mm bit and fix the bubble level with a screw and a 3 mm nut

The screws under board should not protrude as the board should hold flat. 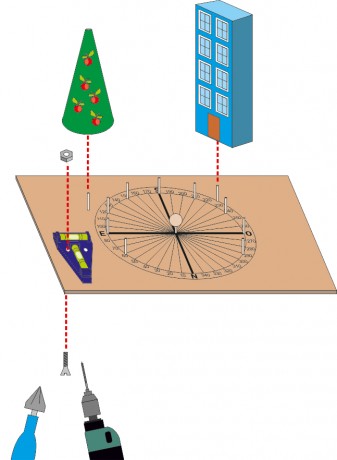
Step 4
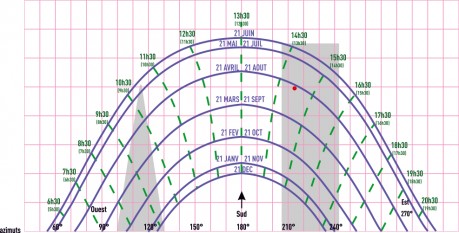
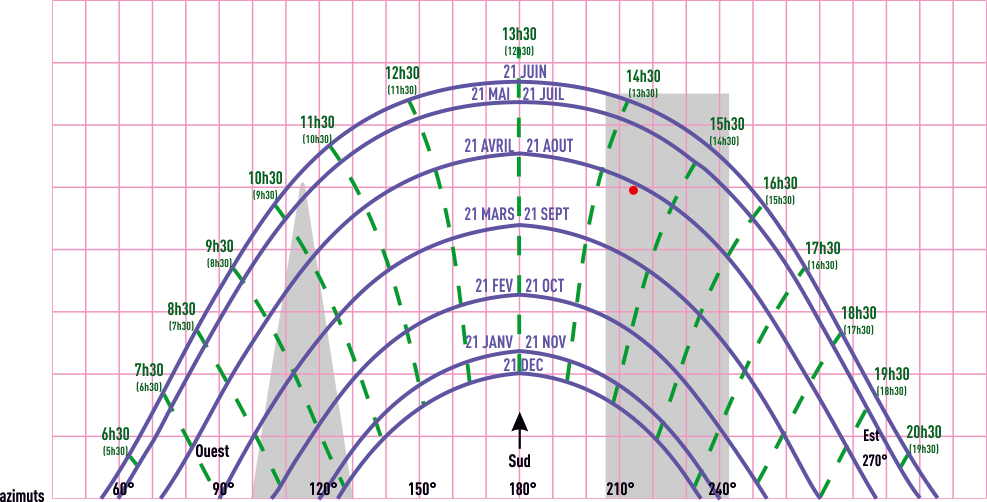
Print the 2 pages of the model downloadable under Blueprints/Pages and reconstruct the diagram of the sun's course by precisely gluing the two sheets together.
 |  |  |  |