 How to use ? - Solar fuel cell
Step 7
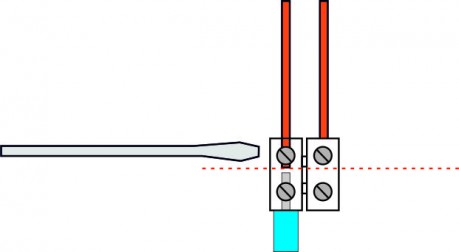
On the other side of the wires, connect crocodile cla by twisting the bare part of the wires through the back hole.
Add on the wires, just before the clips, a label with transparent adhesive tape (transparent pieces of tape folded in half). With markers inscribed on the label the following : red thread '+' / black thread '-'.

Step 8
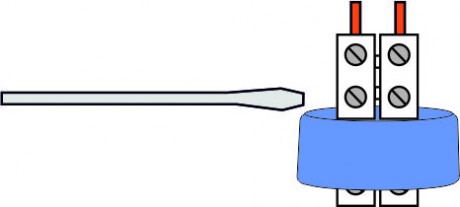
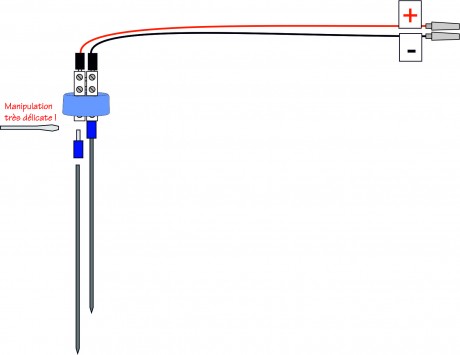
Pass a blue crimp over the unpointed end of a pencil lead. Unscrew the screws of the lower connector and carefully pusch in the lead equipped with the contactor.
While holding the lead and its crimp in place, screw the connector very regularly. As soon as you feal the lead is held and you can't remove it, stop srcrewing !
Once the two leads are in place, slide them into the bottle and gently screw the cap back.
Step 9
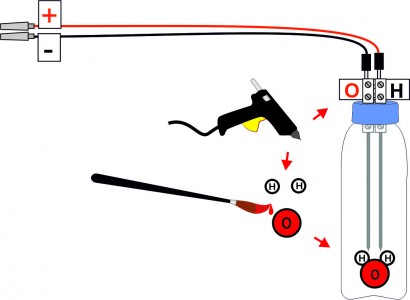
Cut a small rectangle of about 3x1cm in cardboard. At both ends write on one side H (for hydrogen) in black and O (for oxygen) in red.
With hot glue, fix the rectangle to the back of the connector.
Paint the large wooden bead red.
Inscribe with a marker O on the red bead and H on the small beads.
With hot glue, fix the small balls on the large red ball (it forms a kind of Mickey mouse).
Glue the 'Mickey' on the bottle (wait a little for the hot glue to cool down to avoid melting the bottle).
 |  |  |  |  |  |  |


