

 Réalisation - Design and energy saving lamp
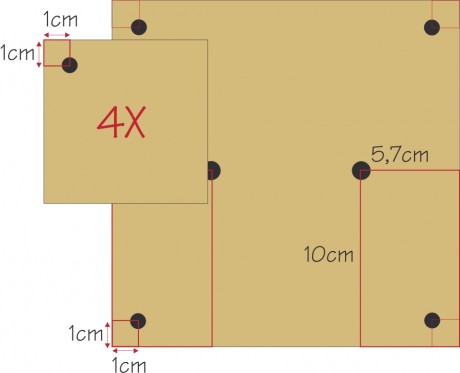
Etape 1
Drill with a 6mm bit a hole at the corner of each small wood square.
With a 6mm bit drill 4 holes at the four corners of the large square and with a 10mm bit 2 holes closer to the 'centre' (see illustration).

Etape 2
With a 10 mm bit drill two holes on each side of the electrical junction box as shown in the drawing.


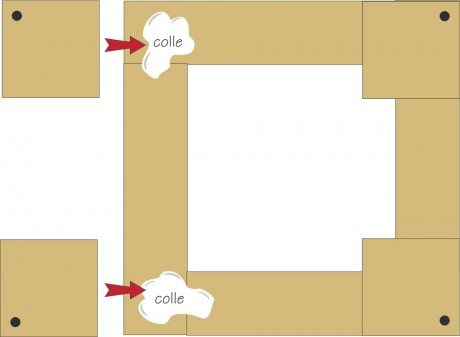
Etape 3
Place the 4 small rectangles of wood to form a square.
Using wood glue, paste the 4 small wood squares at each corner making sure that the holes are placed at the outside corner.

Etape 4
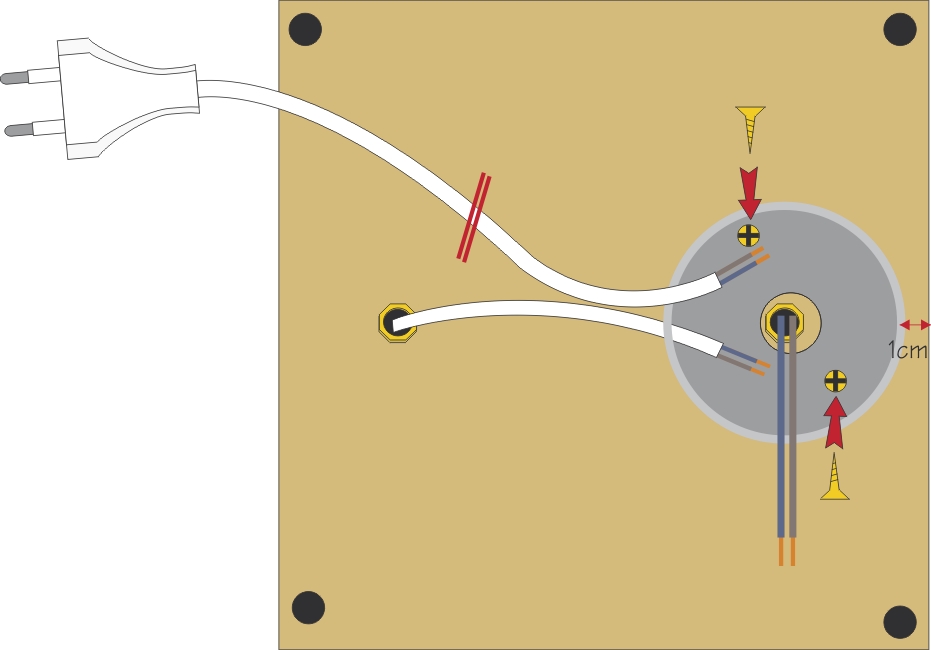
Screw the small rods on the two light bulb sockets.
Connect the long eletric wire to one of the socket and the two 10cm wires to the other.
Pass the threaded rods and the wires through the large square board and tighten the other side with nuts to fix well the sockets on the board.


Etape 5
With 2 small wood screws attach the junction box under the base, about 1 cm from the edge of the board just under the socket with the two separate wires.
The side of the junction box with two holes not next to each other must face outside.
Etape 6
Following the illustration, connect the wires (including the 2 small 7 cm wires) using Wago connectors and switches.
First pass the wire with a plug and the wire coming from the second socket through the 2 holes of the junction box before making connections.
Place all wires inside the box and screw the lid back on.

This work requires high precision and electrical knowledge. If possible ask a specialist to check the connections. 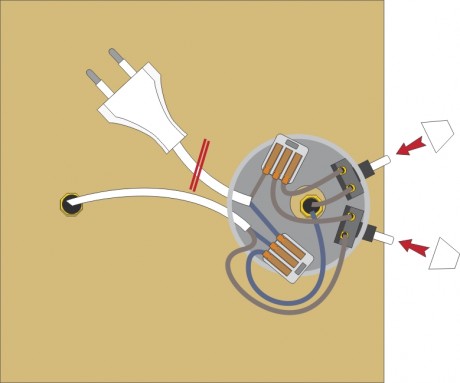

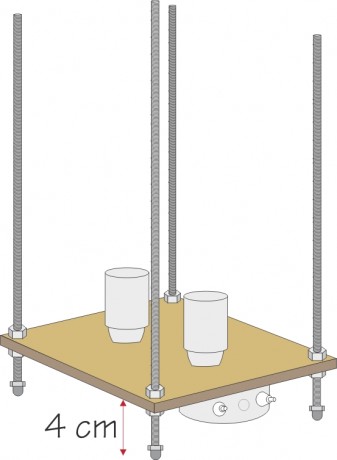
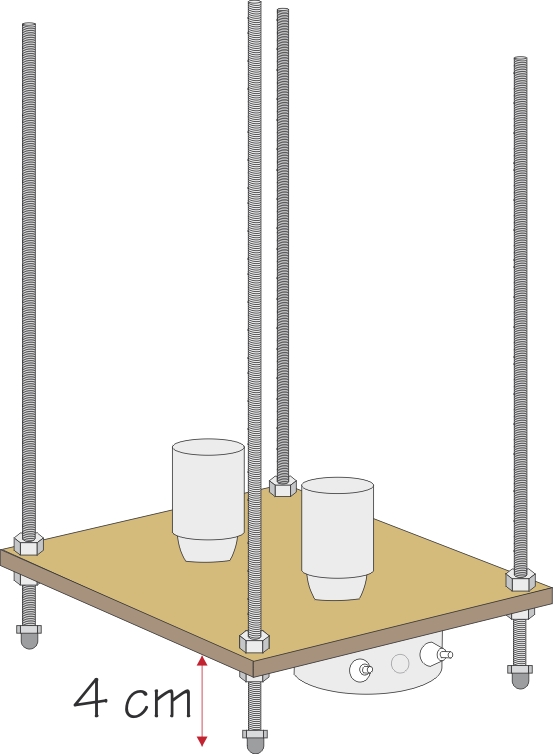
Etape 7
Pass the 4 threaded rods through the holes of the base and attach it using nuts. The rod should come out the other side about 3,5 cm, deeper than the junction box.
Screw 4 cap nuts to create the feet.
Tighten well everything and check that the lamp is stable.
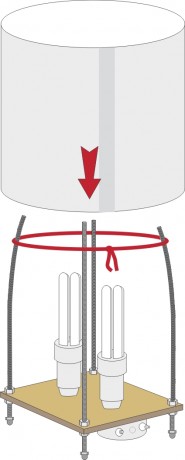
Etape 8
Cut a 75x25cm piece of wrapping tissue paper.
Form a cylinder lengthwise by gluing the ends (1 cm overlapping).
Screw the light bulbs on their sockets.
Bend the threaded rods and keep them in position with a string loop.
Gently lower the paper cylinder until it reaches the bottom.
Once the paper is down, gently loosen the string holding the rods to stretch the paper.

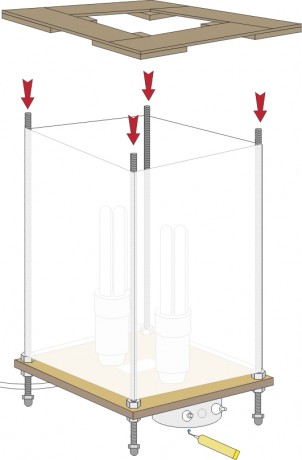
Etape 9
Place the upper wood part on top by inserting the metal rods into the holes in the small squares (tap a bit if necessary).
After checking that the lamp works properly, disconnect it and paste the junction box cover to prevent any access to the electrical parts.

Etape 10
Stick this label between the two bulbs.

 |  |  |  |  |  |  |