

 How to use ? - Crank flashlight
Step 1
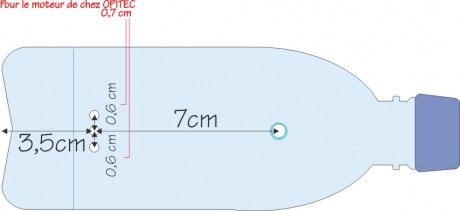
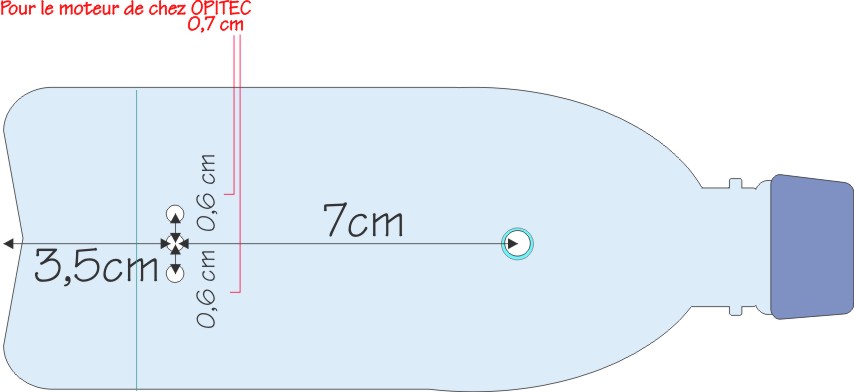
Make 3 small M3 holes at 3.5 cm from the bottom of the bottle (see illustration).
Punch a large M6 hole 7 cm away from the small holes (see illustration). On the other side of the bottle punch a M8 hole just opposite the M6 hole.
Step 2
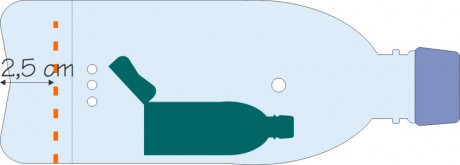
Cut out the back of the bottle using a saw or a pair of scissors.
Leave a small part attached to the bottle as a "hinge".

Step 3
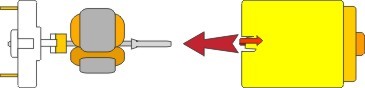
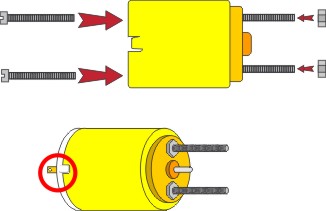
Unfold the two flaps of the electric motor with a screwdriver.
Gently remove the mechanism.

Step 4
Pass from inside two M2x20 bolts through the 2 holes of the motor cover.
On the outside, screw strongly 2 nuts on the bolts with pliers and a screwdriver.
Put back the mechanism in place and fold back the flaps.

Step 5
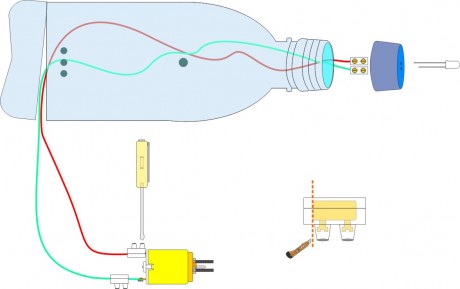
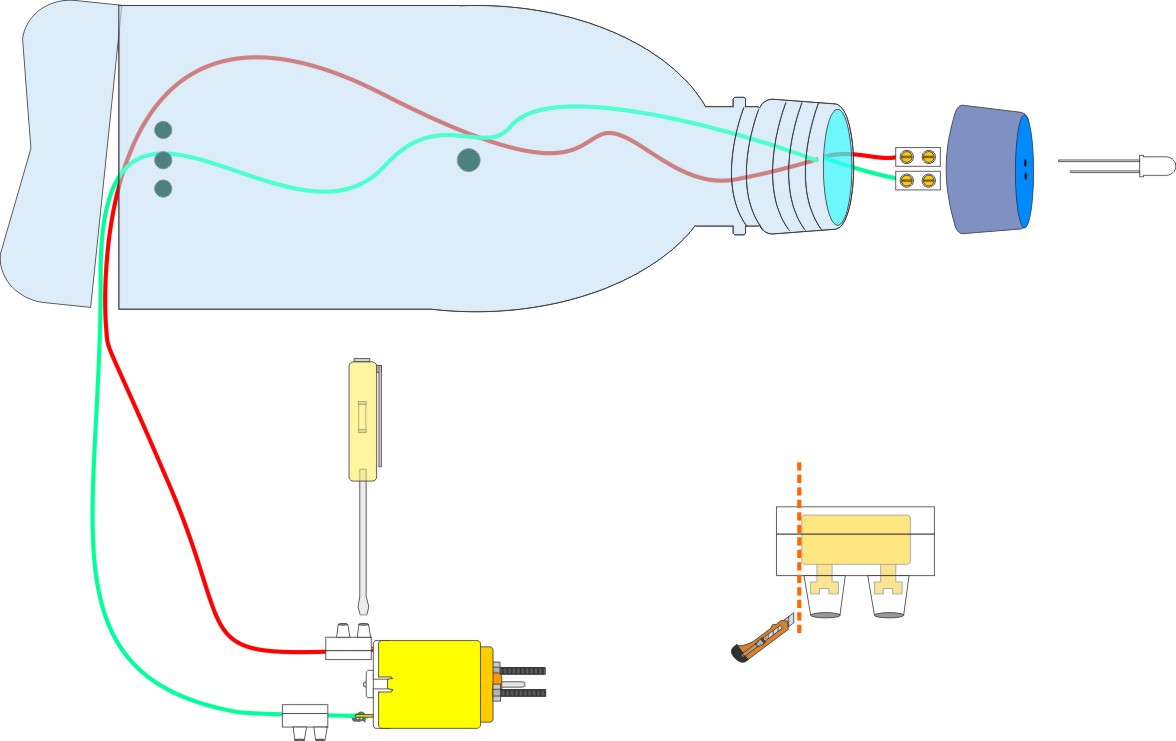
Make two small holes with a punch in the cap of the bottle.
Pass the two "legs" of the LED through the holes and connect them the ogher side of the cap with a pair of electrical connectors.
Connect two wires to the connectors and pass them through the neck of the bottle, and then through the cut at the back. Screw back the cap on the bottle.
Cut the end of two electric blocks until the metal part (this will help to connect the "legs" of the motor).
Pass the wires all the way through the electrical connectors and twist them around the two contacts (legs) of the motor. Push on top the connectors and screw well.
Step 6
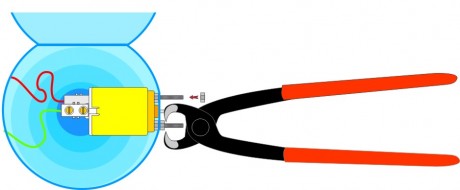
Fix the engine in the bottle by passing the 2 screws and the axis through the 3 small holes.
Pass two M2 nuts on the bolts and fix firmwith pliers.
Cut the bolts just above the nuts with wire cutting pliers.

Step 7
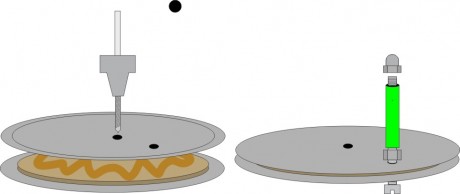
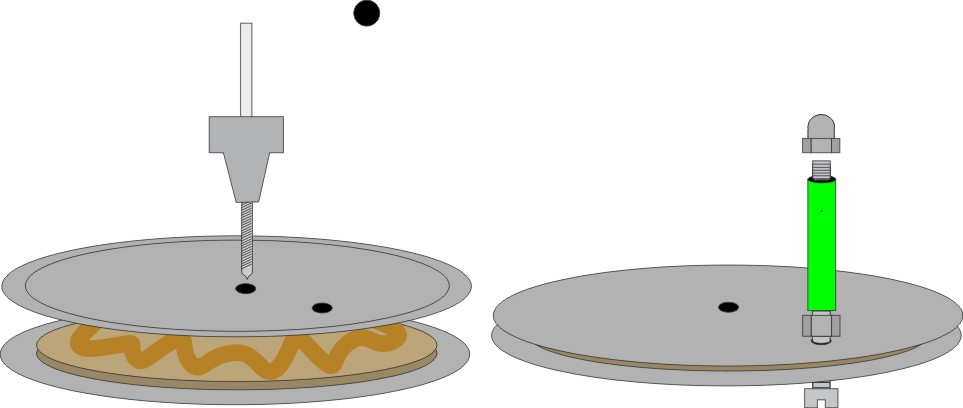
Cut two discs in the cardboard following the model and reporting the inner circle (wher the wooden disc will be set) and the two points.
Glue the wood disc between the two cardboard discs.
Drill two holes M6 at the indicated locations.
Pass a M6x50 bolt screw through the "external" hole and fix a nut, a plastic tube and finally an acorn nut at the end. The tube must move freely on the bolt.
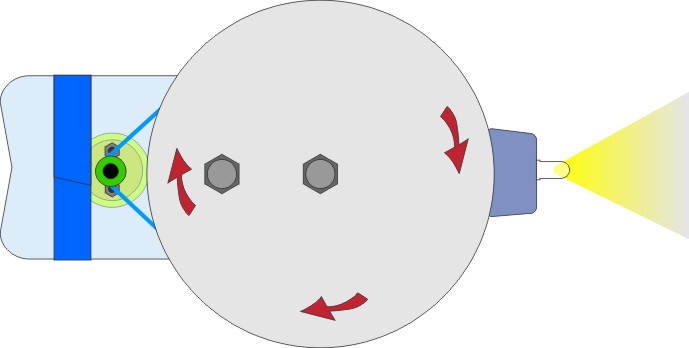
Step 8
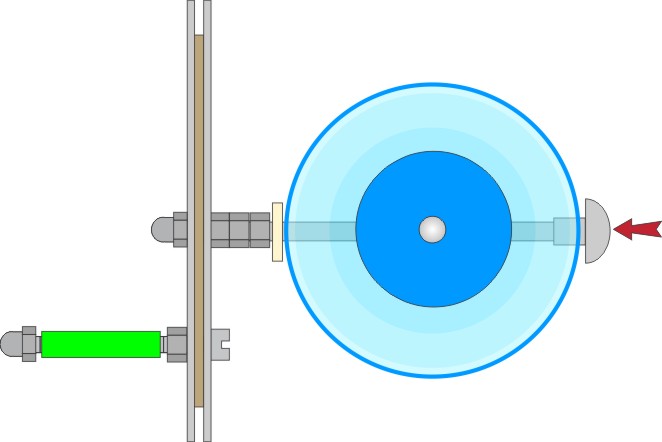
Pass the large M6x80 bolt through the M8 hole of the bottle. On the other side (motor side) pass on a plastic washer, three nuts tighten very strongly against each other and the disc. Finish by screwing an acorn nut.

The disc must be able to turn easily but without too much play. 
Step 9
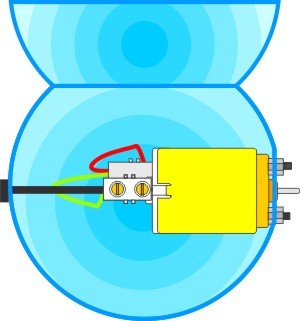
Make a small hole on the opposite side of the motor. Push inside a nail and fix it in the nearest electrical connector.
This fixes better the motor in the bottle (ads more "stiffness").

Step 10
With a box cutter, extract the metal part from a 4mm electrical connector.
Screw a telephone socket to this metal connector at one end and fix the other end to the motor axis.
Verify that the axis of the engine turns freely without touching the plastic bottle and that all parts are well aligned 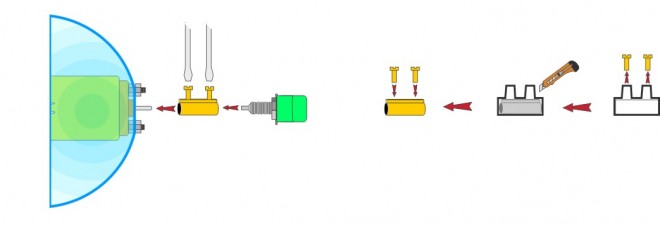

Step 11
Screw back the cap of the bottle and close the bottom slot with insulating tape.
Connect the disk to the engine by passing a rubber band between the two cardboard disks and around the telephone socket.
Try different sizes of elastic bands to find the ideal one. The cardboard disc can be decorated to add some fun !

 |  |  |  |  |  |  |  |  |